Ready or not, winter is here. But, rather than wishing it away, we’re taking advantage of the perfect excuse to stay inside and cozy up at home with delicious home-cooked food and new hobbies. This season, we are all about wreath making. With so much beautiful winter greenery available and the prospect of spending time with friends and family again, we’re taking inspiration from the season to create a beautiful welcome piece for our front door.
Up ahead, we share how to make a dried wreath using pampas grass, eucalyptus, evergreens, and seasonal citrus.
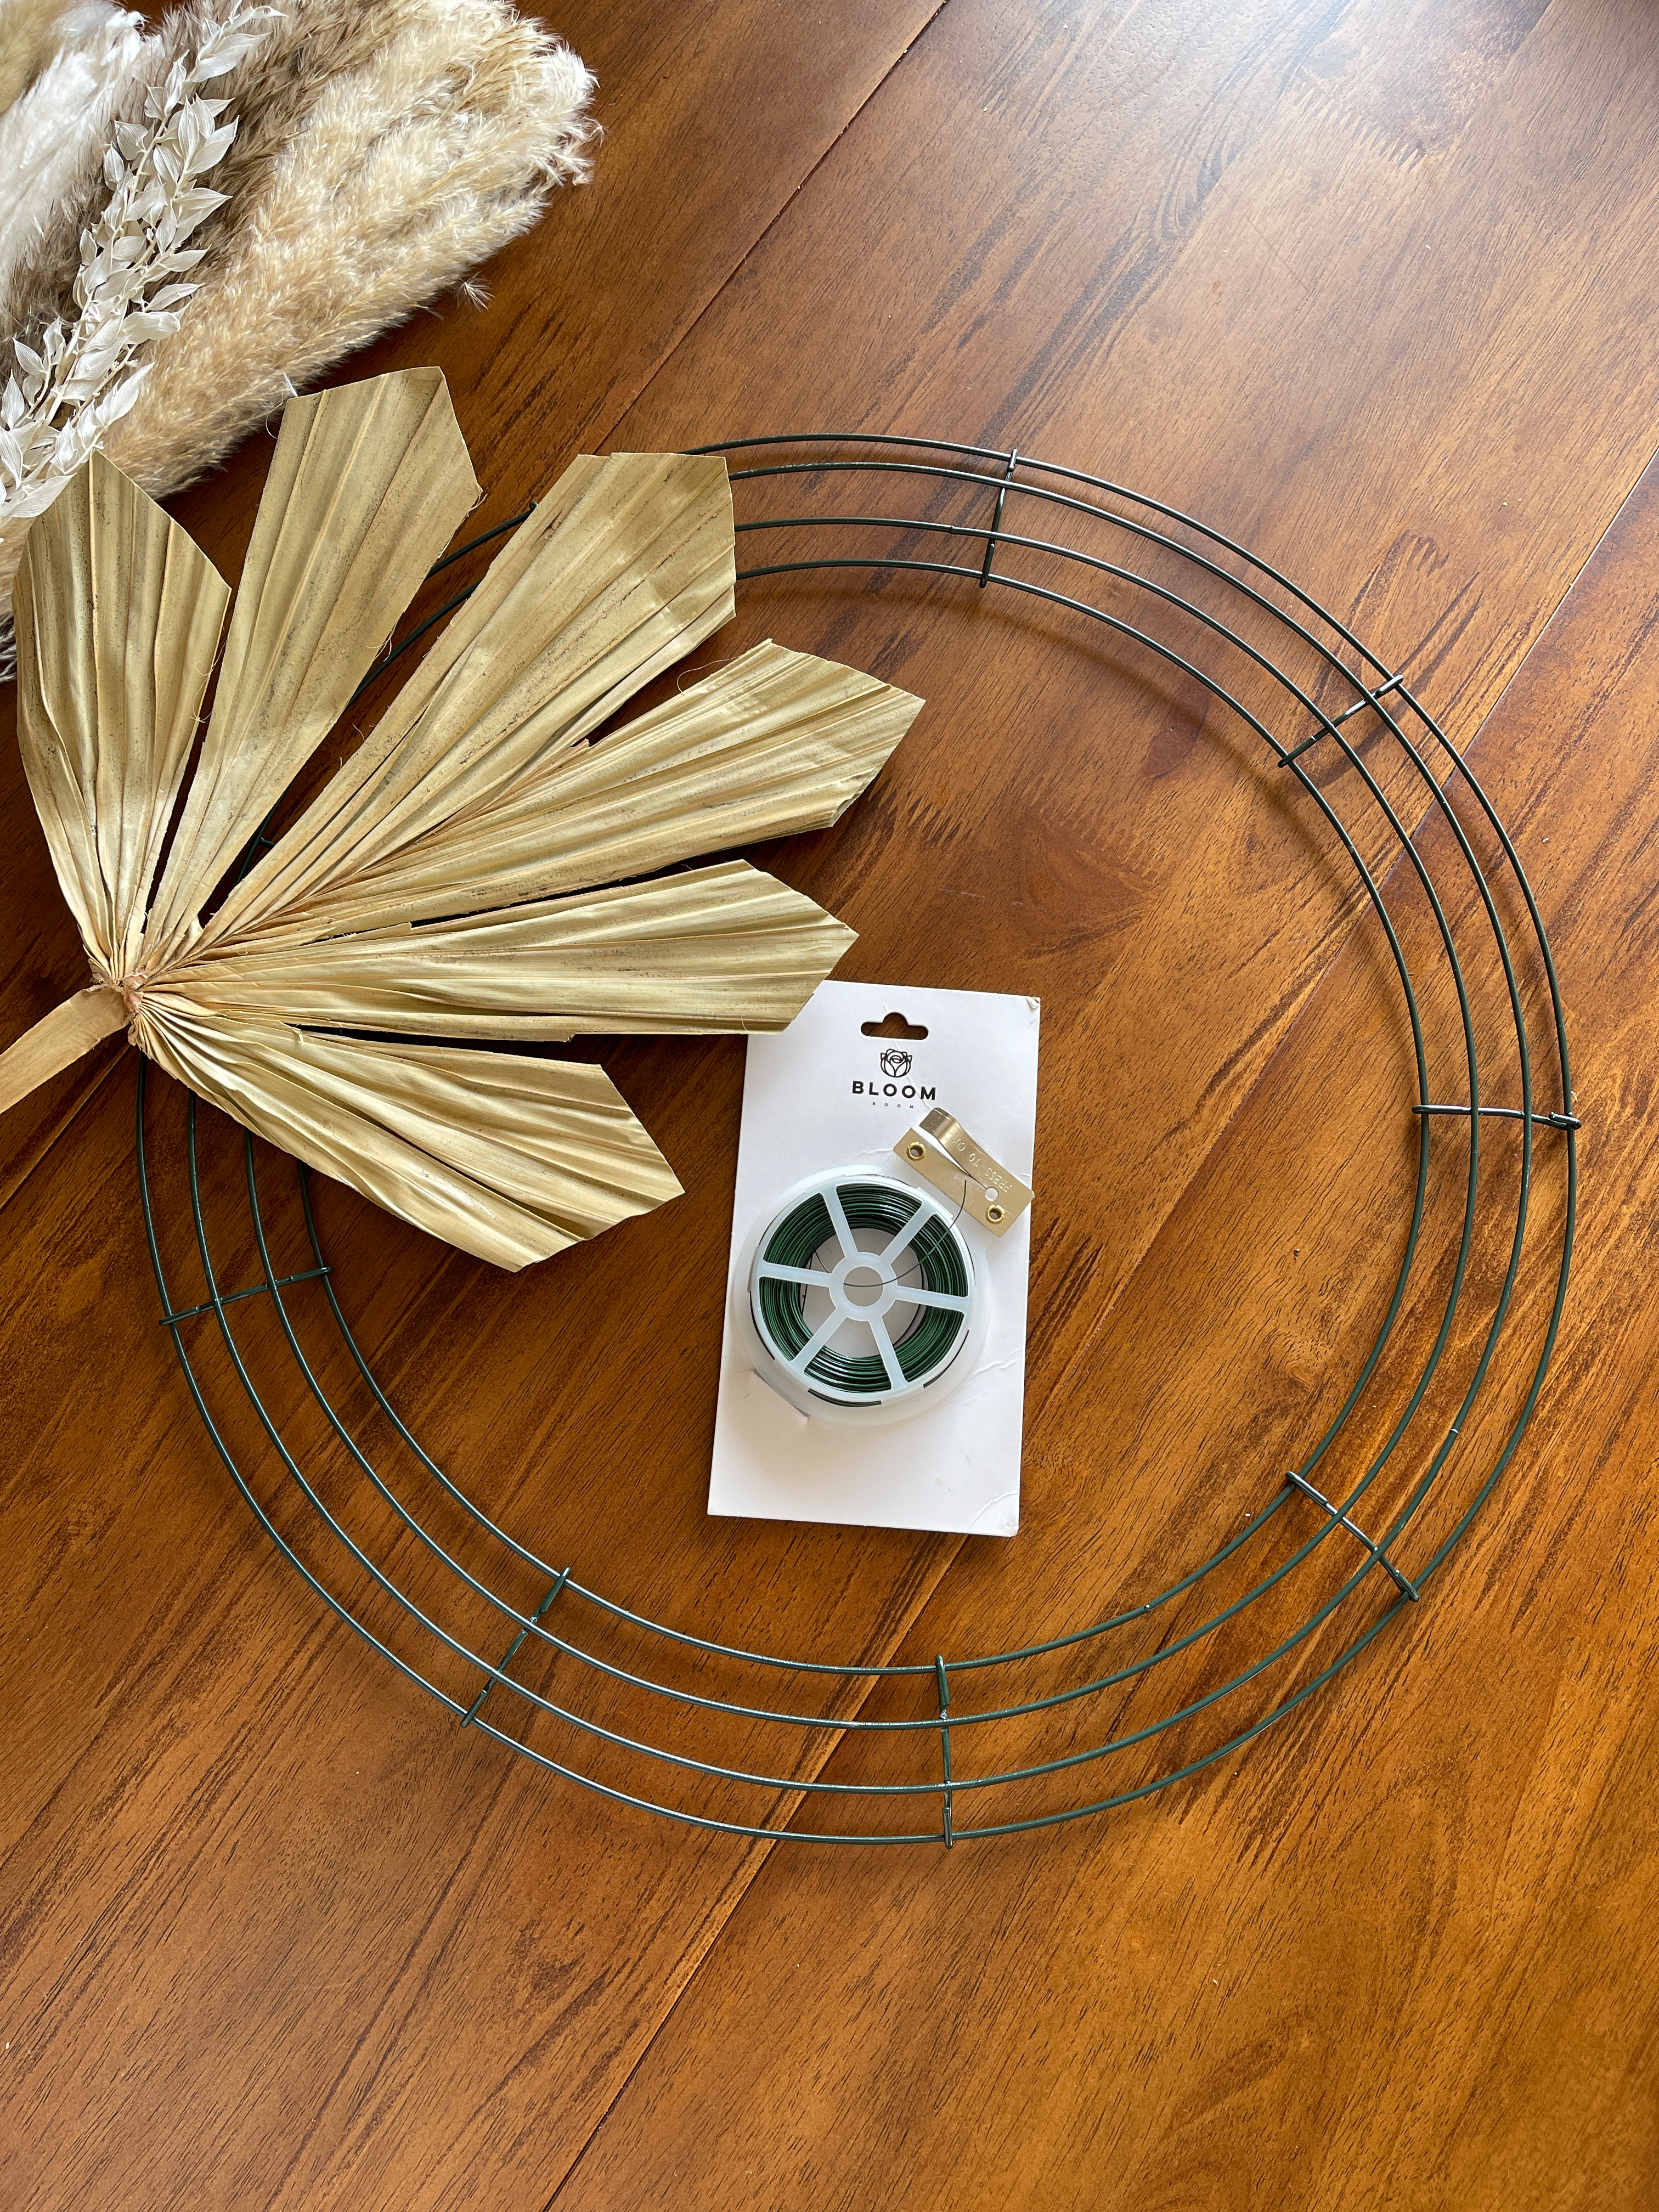
Supplies
- Round 18-inch wire wreath frame
- Eucalyptus
- Winter greenery
- Dried pampas grass bouquet
- Dried Dipsacus thistle
- Dried sun palms
- Floral wire
- Hot glue gun and glue
- Navel orange slices
Step 1: Source the Materials
As with any DIY project, the first step in this homemade winter wreath project is to source your materials. We went to our local grocery store for one bunch of silver dollar eucalyptus and a winter greens mixture, which included Christmas tree pieces (aka, spruce), cedar, and a fluffy spring of pine. While we were there, we also picked up one orange to create the dehydrated slices.

The rest of our supplies were easily ordered online. We found the dried sun palms and dried Dipsacus thistle on Afloral, which has lots of dried florals to choose from. As for the pampas grass, we found a bouquet online that had a variety of pieces, plus some dried florals. The wire wreath frame, floral wire, and hot glue all came from a craft supply store. For our wreath shape, we chose to go with the classic circular shape but there are lots of other options online. We love this star-shaped wreath form and this set features a circle, star, heart, and candy cane.
Step 2: Dehydrate the Orange Slices

Once you have sourced all your materials, it’s time for some dehydration! If you have other winter projects — such as stovetop potpourri, garland, or toppings for baked goods — and want to add some extra slices, now is a great time to do so.
First, cut oranges to create large O-shaped slices. You’ll want to get these as thin as possible to cut down on cooking time. If you have a dehydrator, simply follow the instructions that came with your appliance. If you do not have a dehydrator, you can easily get the same effect without one. All you need to do is place the slices on a parchment-lined baking sheet (about ½ inches apart) and bake on the middle rack at 200 degrees Fahrenheit for 3-4 hours. At about halfway through, check up on the slices to make sure they’re on their way to achieving that shriveled dehydrated look and give each slice a flip to ensure even drying time. Once slices are out of the oven, allow them to cool before using.
Editor’s Tip: I like to make my orange slices the day before a project and let them sit out on a baking sheet or platter uncovered to keep them dry.
Step 3: Cover the Wire Wreath Frame in Winter Greenery

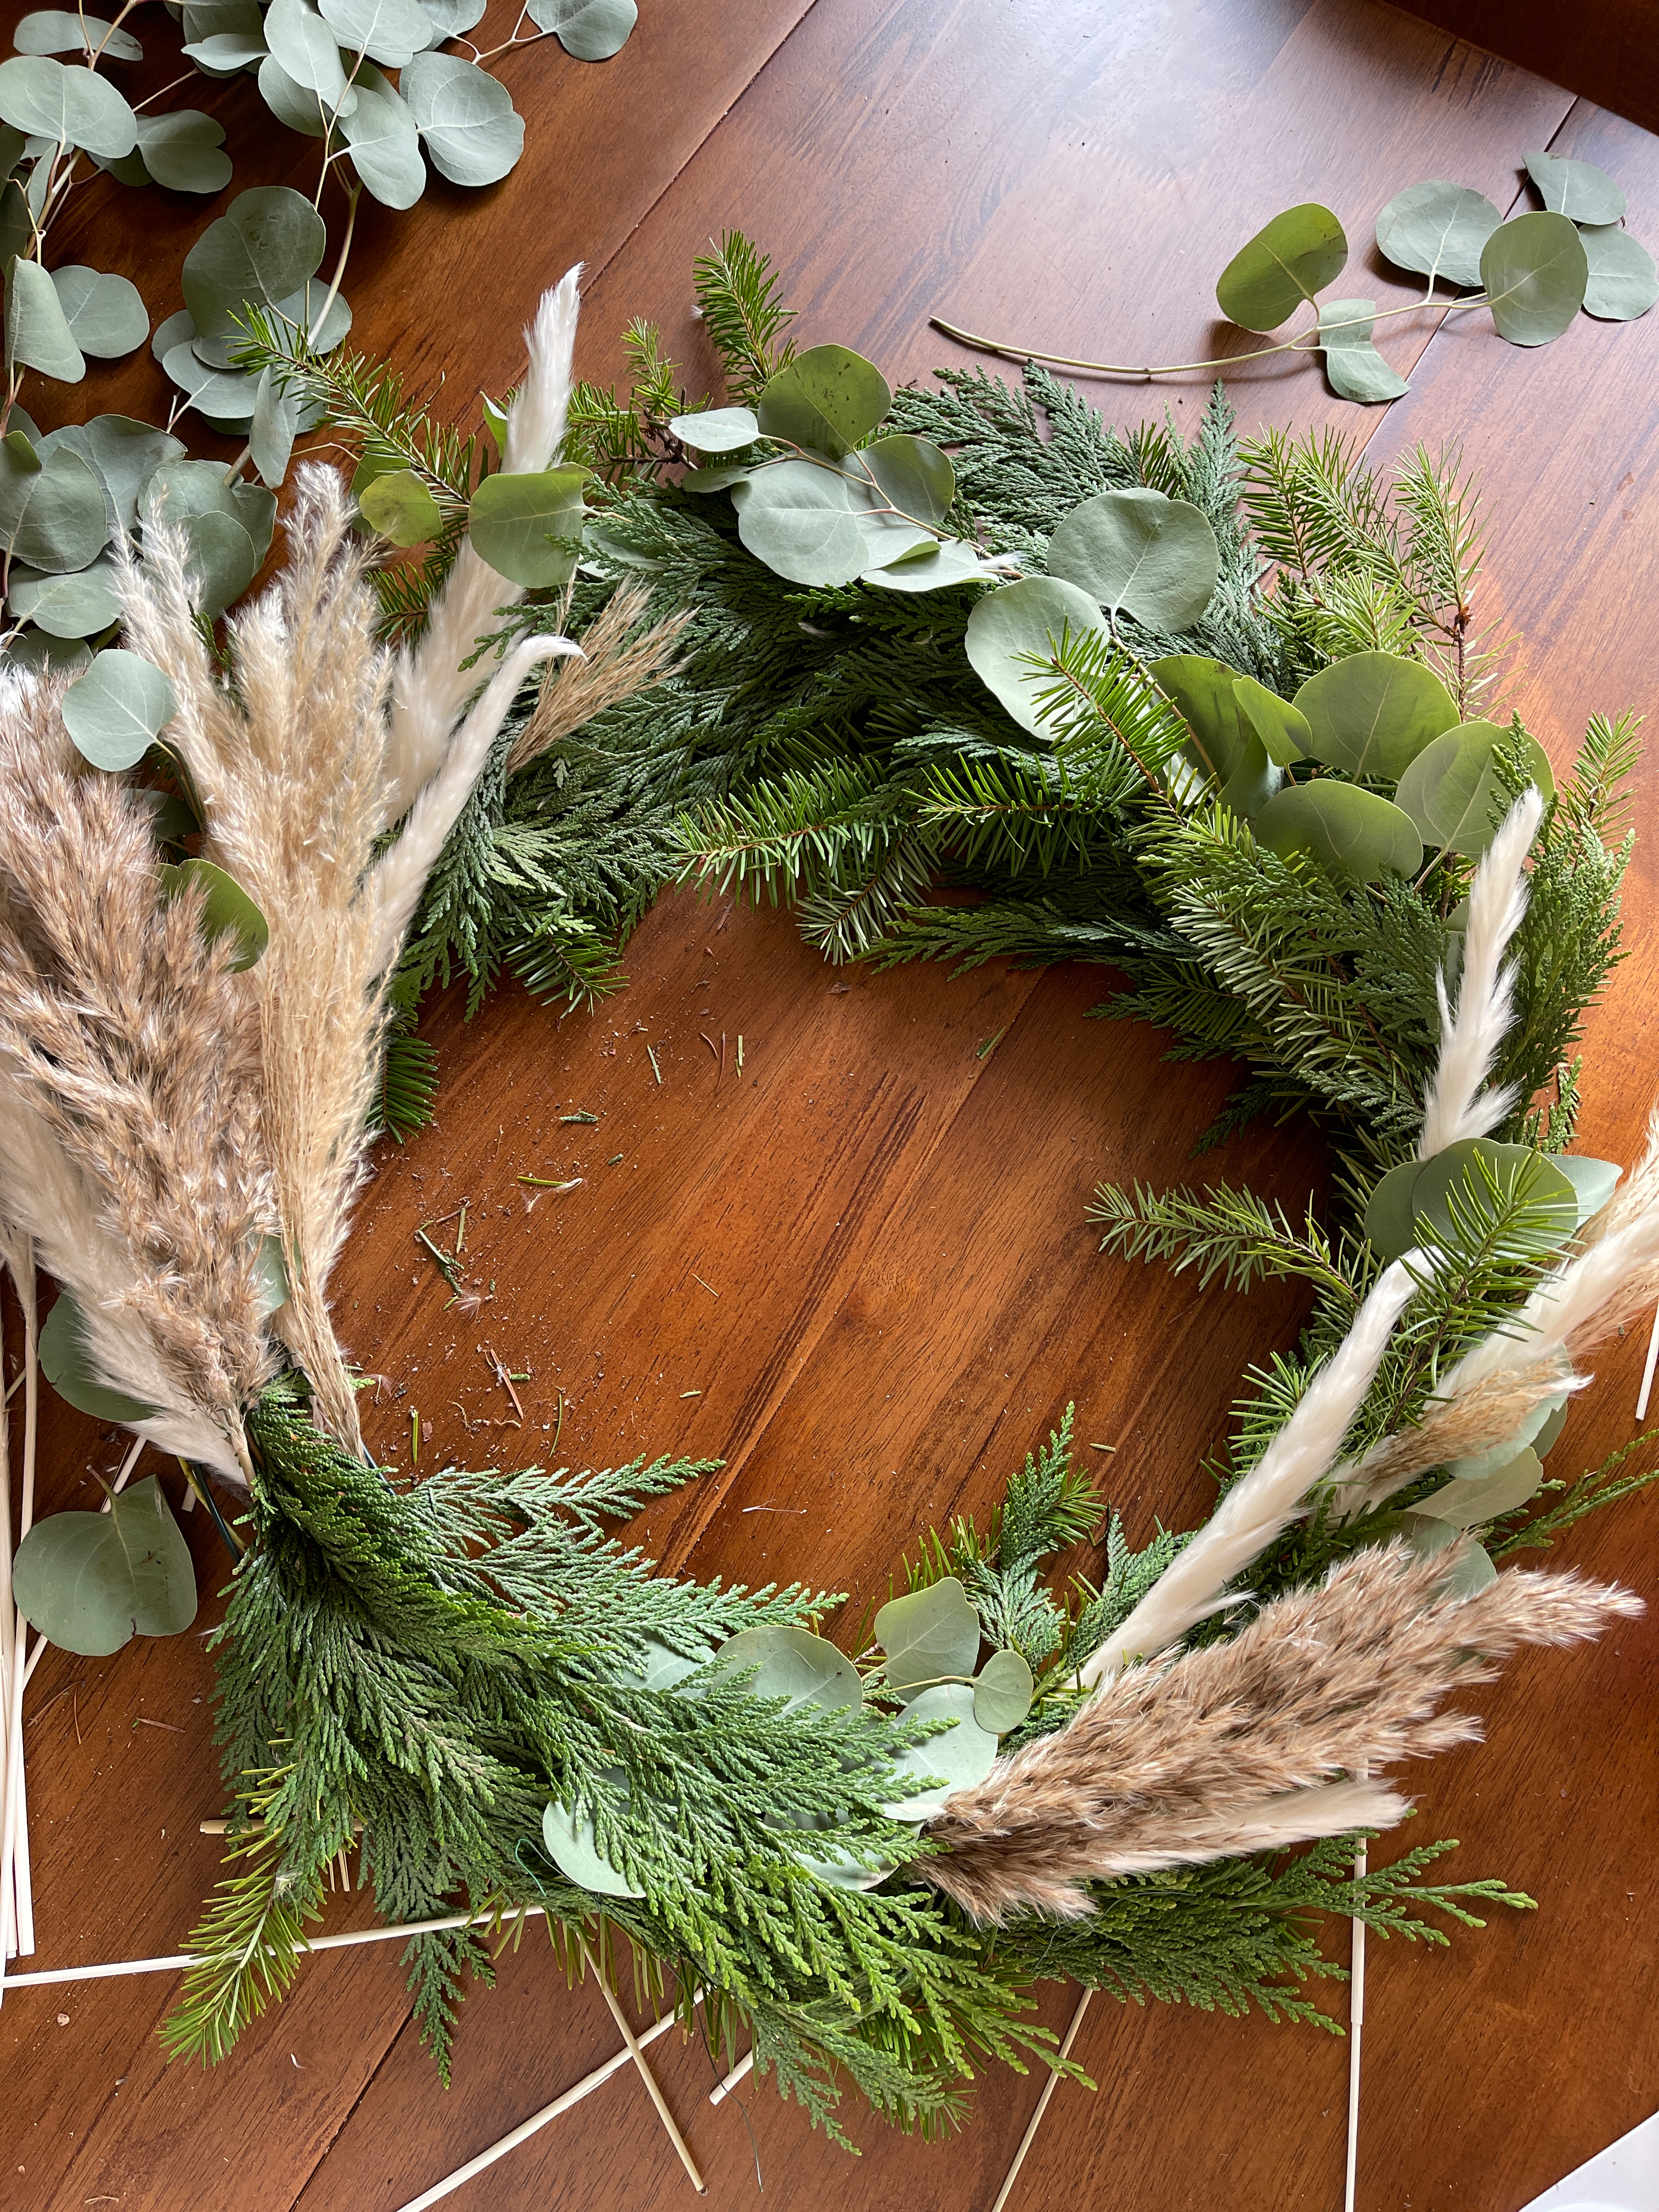
First, clear a table and place the wreath form at the center of the table for easy access. Then, separate your winter greenery pieces so you can clearly see what you have to work with. We started by adding Christmas tree pieces around our wreath, leaving an open area on the bottom left side for our focal point. To attach the greenery to the wreath form, we cut pieces of floral wire and tied the pieces around the wreath form. Once our wreath form had a good layer of Christmas tree pieces, we reached for the bunches of cedar and did the same thing.
The more sprigs you add, the easier it becomes to attach branches to the wireframe. You can use the floral wire to secure an area in place and then weave the branch in and out of the form and other branches to get everything to hold together nicely.
Our winter greenery came with a branch of fluffy pine that we decided to keep for the focal point bouquet. So, after the layers of spruce and cedar, it was time to move onto the eucalyptus.
Step 4: Add the Eucalyptus
Start by separating the eucalyptus bunch out so you can see how many branches you have to work with. Then, leaving the focal point area empty, work your way around the wreath form, adding springs here and there for a nice touch of cooling silver dollar eucalyptus. Make sure to use the floral wire to hold pieces in place and tuck the branches around other springs to keep the back and sides looking clean.

Step 5: Put Pampas Grass in Place
Once your base of winter greenery and eucalyptus is complete, it’s pampas time! For this step, we recommend sticking each spring in place without securing them down so that you can easily move the variations around as you design your wreath. Once you’re happy with how everything looks, attach them using floral wire and weave the ends into the back.

Step 6: Design Palm Bouquet for the Focal Point
At this point, your wreath should have an area that feels empty. You might have some greenery overlapping this area but, for the most part, there is a hole that needs filling. This is your focal point area, where you will add the palm leaf, thistle, dried floral pieces, and anything else you wish to add. We recommend creating a miniature bouquet out of these items first so you can see how everything will look together. Then, once you’re happy with the outcome, put everything in place. To ensure these pieces fit nicely, start by attaching the palm leaf and then weave in the other wintery sprigs. For the thistle, you’ll want to cut the wooden skewers to a shorter size so that they do not stick out the sides of the wreath. You can even secure them in place with a little hot glue.

Step 7: Hot Glue Orange Slices in Place
The final step is to add your dehydrated orange slices. Start by placing each slice in the pattern you want (we went for a layered trio) and then reach for your hot glue gun to secure them in place.

Because this wreath features dried florals and winter greenery that dries nicely, this DIY winter wreath should last you the whole season. And, if you have any leftover materials — such as the pampas grass, palms, and thistle — you can always place them in a vase and make a matching arrangement.
We only recommend products we have independently researched, tested, and loved. If you purchase a product found through our links, Sunday Edit may earn an affiliate commission.


