The coziness of fall has us feeling the urge to stay in and nest before the bustling holiday season begins. One way we’re adding in some R&R (for ourselves and our homes) is with simple DIY home decor projects that elevate our space — and this one is a great excuse to buy ourselves some flowers, too.
Textured vases are one of this season’s most popular home decor trends. But, you don’t need to spend a fortune to add this must-have to your autumnal furnishings. Whether you’re a seasoned crafter or it’s your first time ordering DIY supplies, this project is as attainable as it is chic. We share how to make these DIY textured vases, including some tips and tricks for adding more texture, ahead.
Supplies
- Old vases
- White acrylic paint
- Baking soda
- A clean plastic takeout container, or an old food storage container
- Paintbrush
- Acrylic paint in a color scheme of your choice
- Newspaper or a painting drop cloth
Step 1: Source Your Vases
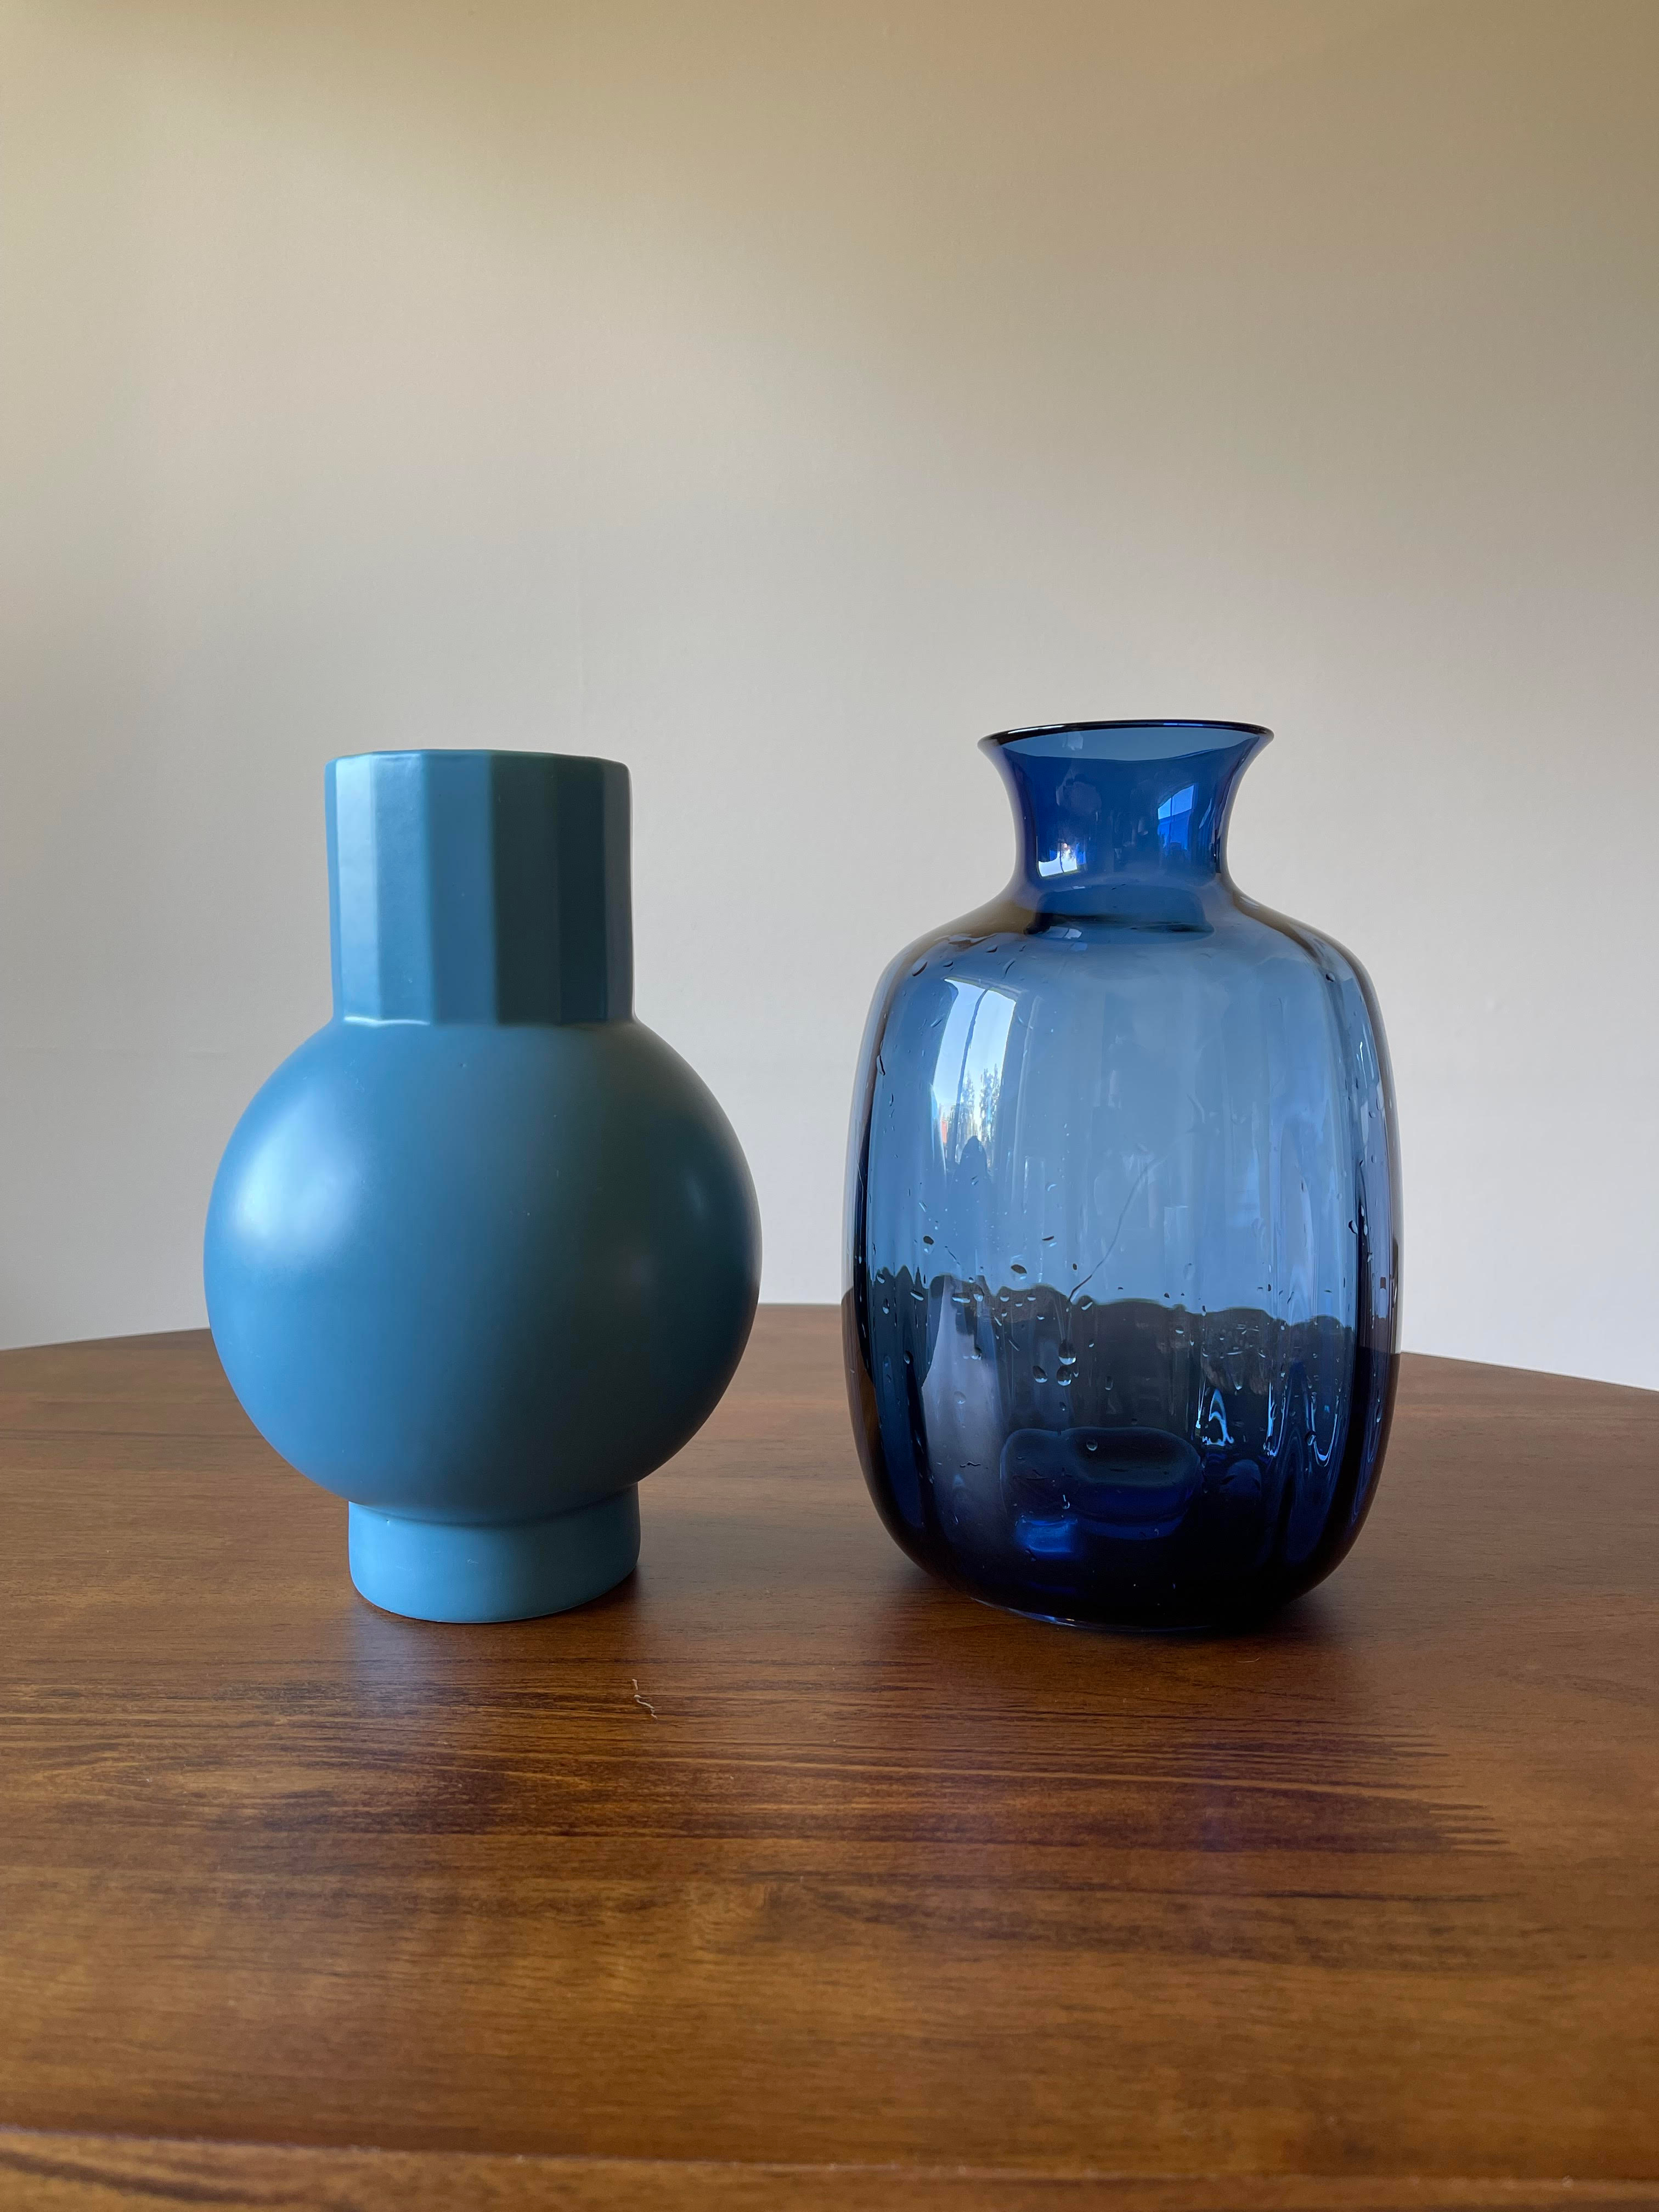
Sourcing vases for this DIY fall decor project is half the fun — especially if you love to thrift. For this project, you’ll want to find either glass or ceramic vases to paint. You can rummage through your cabinets for some old vases you no longer use, or you can stop by your local thrift store and find some in need of a second life.
We shopped our cabinets for old vases we no longer use and found two blue vases in ceramic and glass. Then, we went to a thrift store to pick up a clear glass vase for a total of three vases. If you’re new at DIY, glass is the best option because the primer mixture will glide across it much easier compared to ceramic.
If you wish to keep your vases white, we recommend sticking to clear glass vases as covering up a colorful base with just primer can also be tricky. That said, if you don’t have a clear vase on hand, you could paint your vases with the primer mixture (step 3) and then go over your vases again with plain white paint (step 4).
Step 2: Mix White Paint and Baking Soda to Make the Primer Mixture
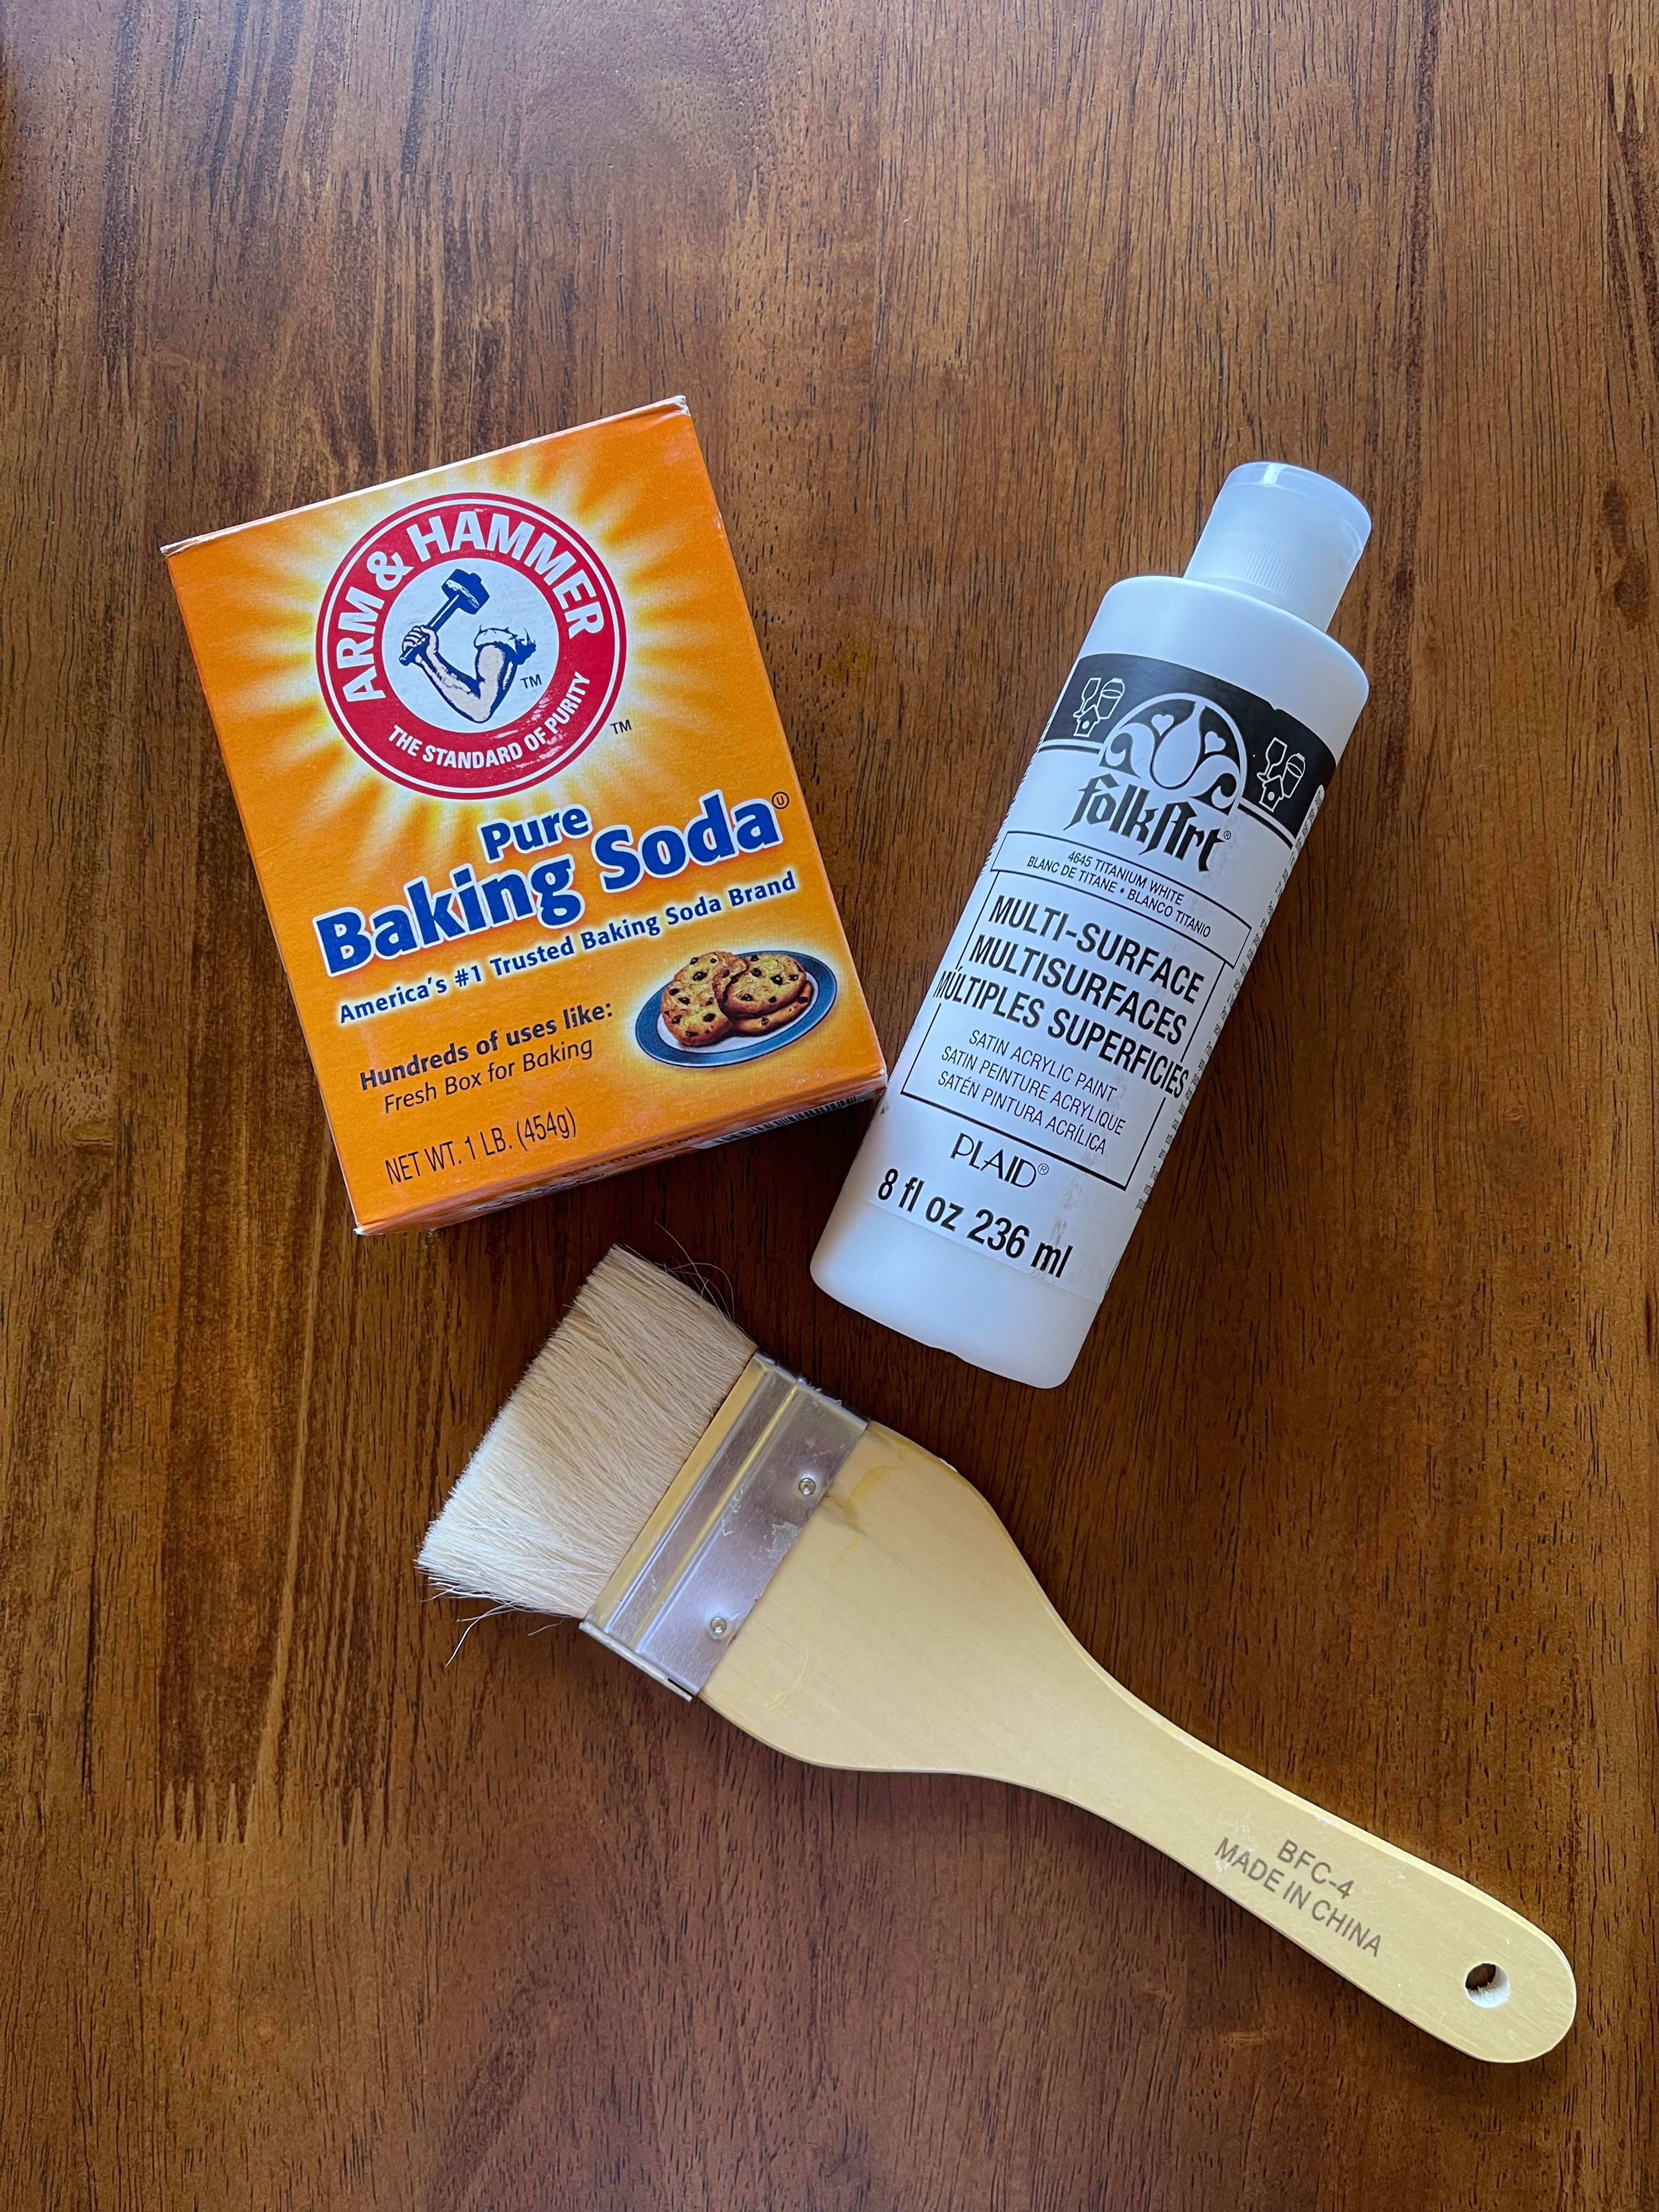
This step is the heart of this DIY. Mixing acrylic paint with baking soda is what gives these upcycled vases the textured, plaster-like effect we’re going for. For this step, you’ll mix two parts of paint with one part of baking soda. We used an old (clean) plastic takeout container as our palette mixing tray, but you could also use a paper bowl or old plastic food storage container. The amount of paint and baking soda you use will depend on the size and number of vases you choose to paint. We recommend starting with a 1 pound box of baking soda and 8 ounces of white acrylic paint.
When creating the mixture, we recommend mixing it a little at a time. The longer the baking soda and paint are together, the thicker the mixture will get. So, creating the mixture as you go is the easiest way to achieve this textured look. That said, if your mixture does start to get too thick, you can always add a few more drops of paint and stir to break things up a bit. You’re going for a texture that is slightly thicker than the paint and appears “fluffy.”
Step 3: Apply the Primer
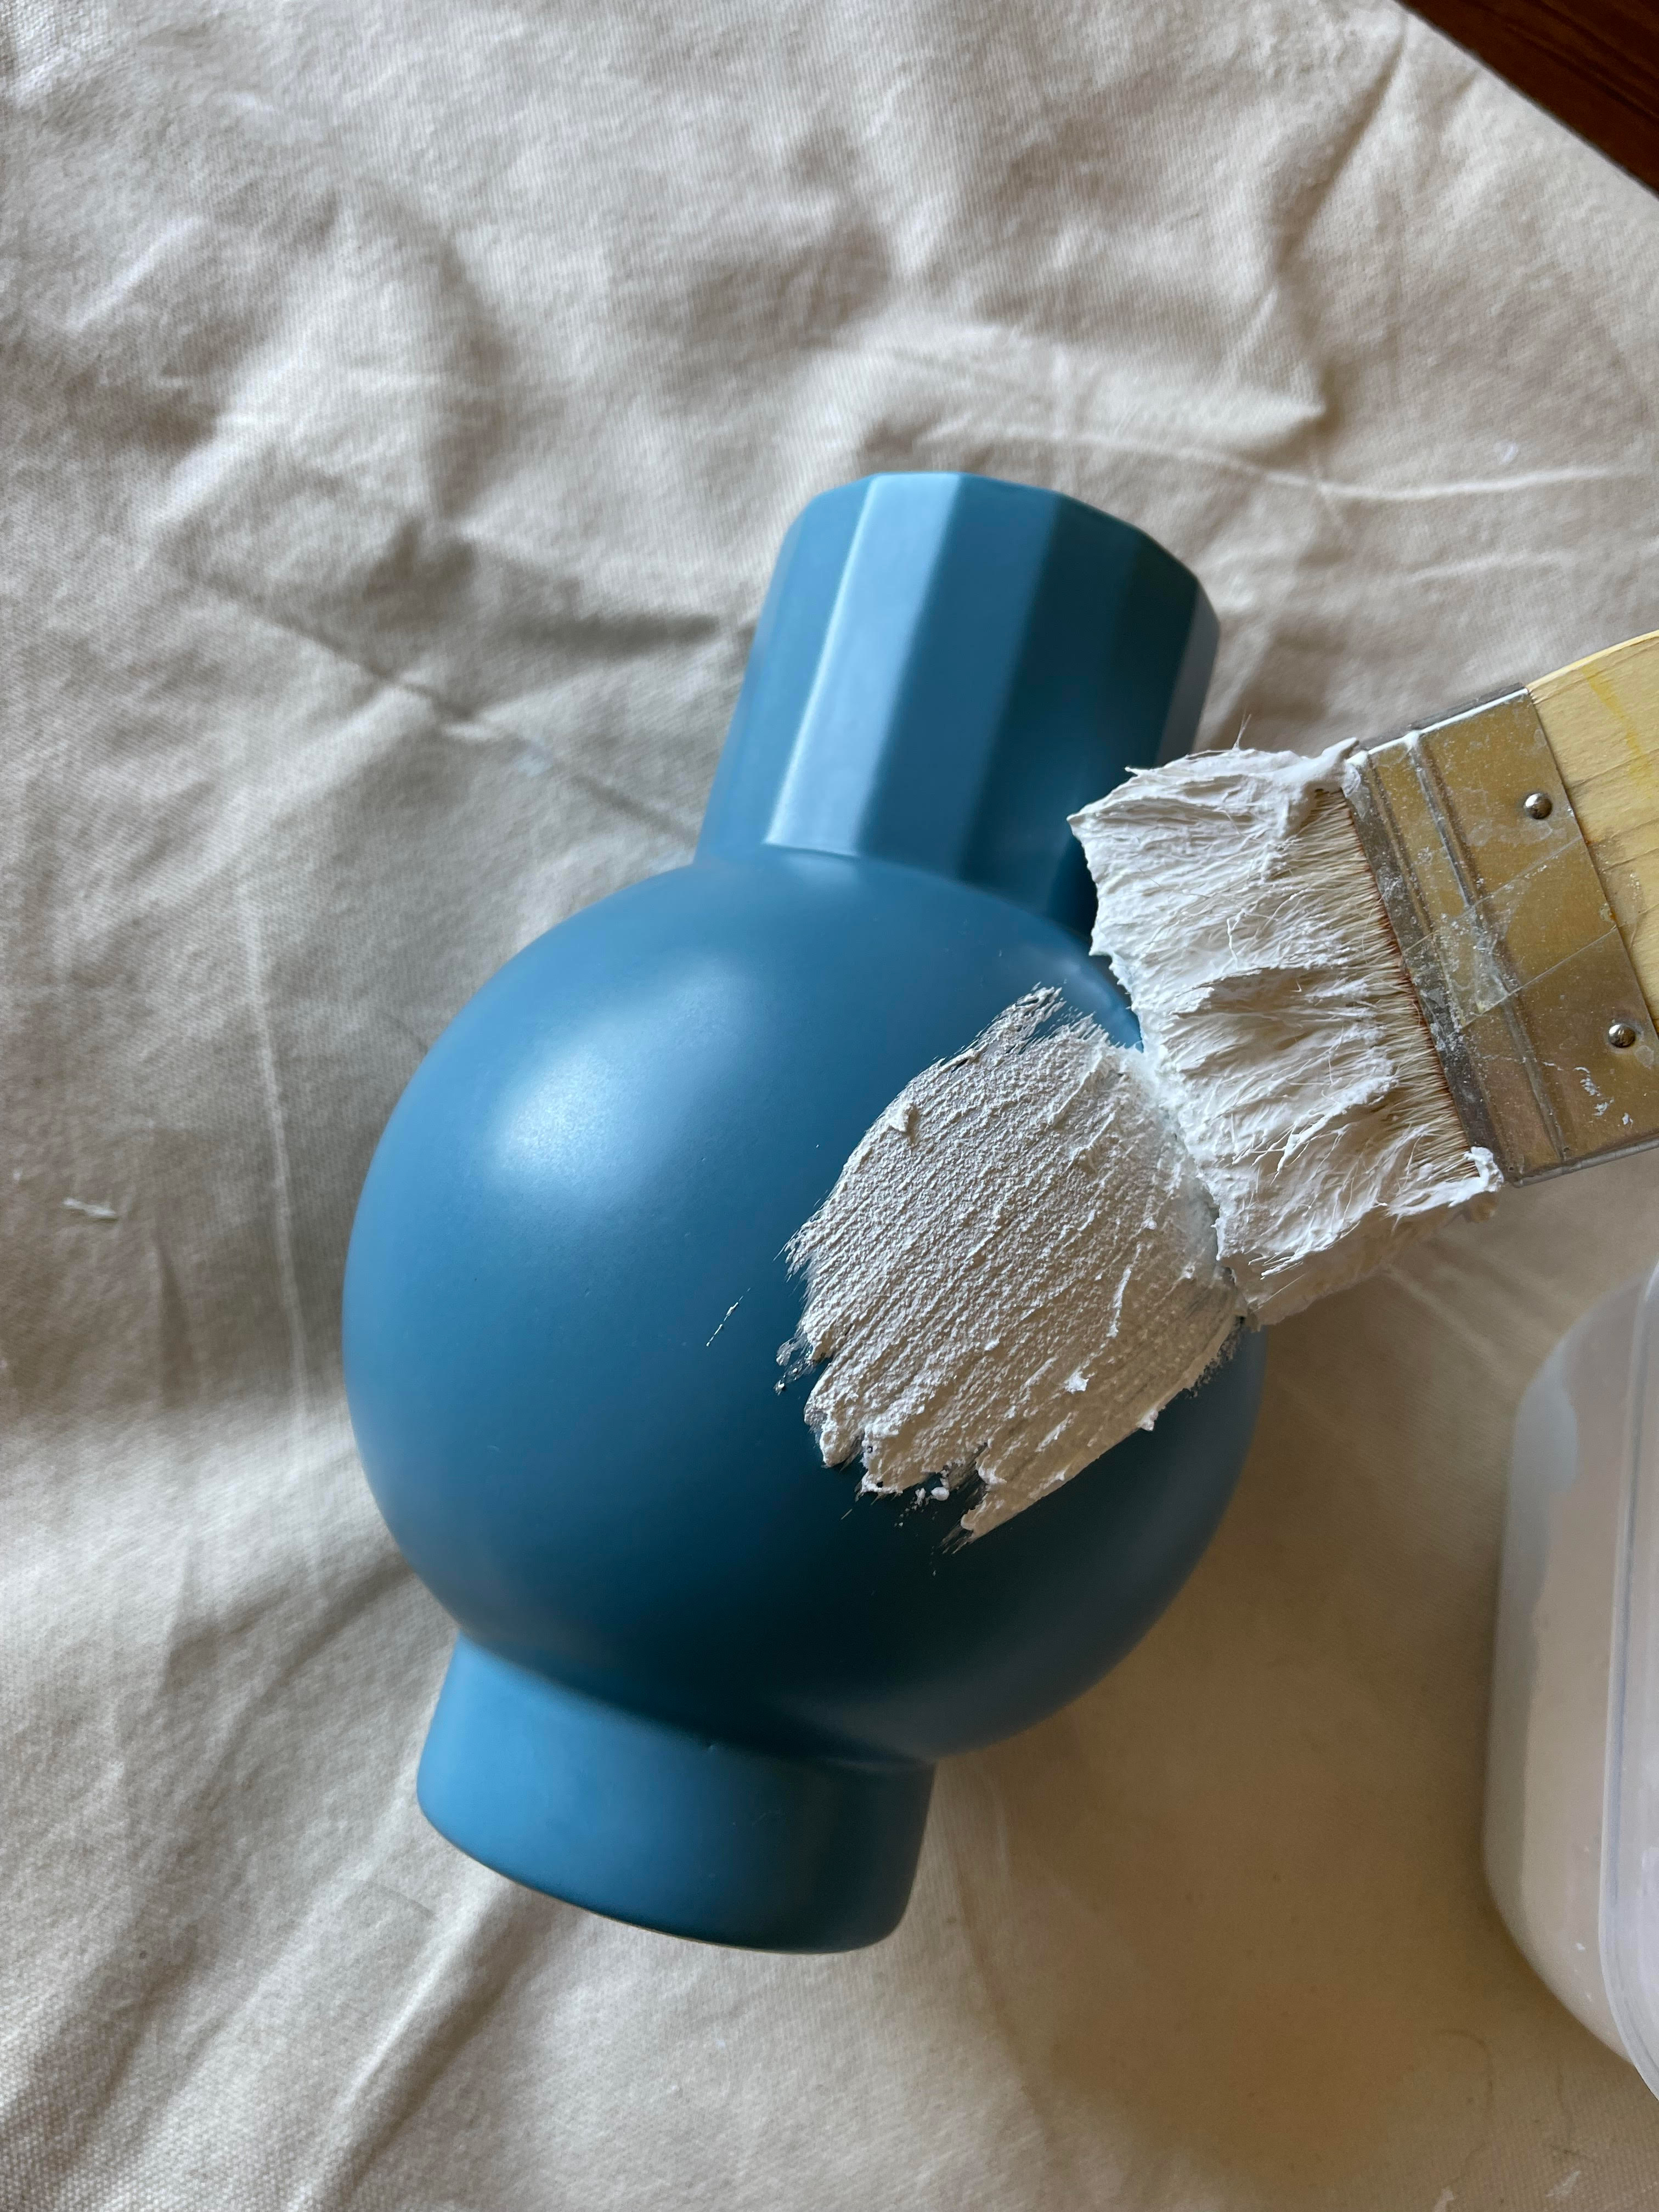
Now that you’ve mixed the paint and baking soda together, it’s time to give these vases a makeover. A bristled brush is the best for this step as a sponge brush tends to absorb too much paint and is harder to glide the thick textured mixture across the vases. We recommend having a couple of different sizes on hand, especially if you have vases with smaller features like a long neck.
Dip your brush in the paint and baking soda mixture and scoop some of the mixture onto your brush. Then, apply it directly to the vase, covering as much surface area as possible. Because of the grittiness of the baking soda, the texture will form naturally on your vase. However, you can always add a little more. One method we like is to take a dry bristled brush to the wet vase and create strokes in different directions and angles. You can also glob on some extra mixture in some parts to create a more rustic look. Once your vases are covered in primer, it’s time to give them a pop of color.
Pro Tip: Paint and texturize half the vase and let it dry before moving on to the second half.
Step 4: Add Color
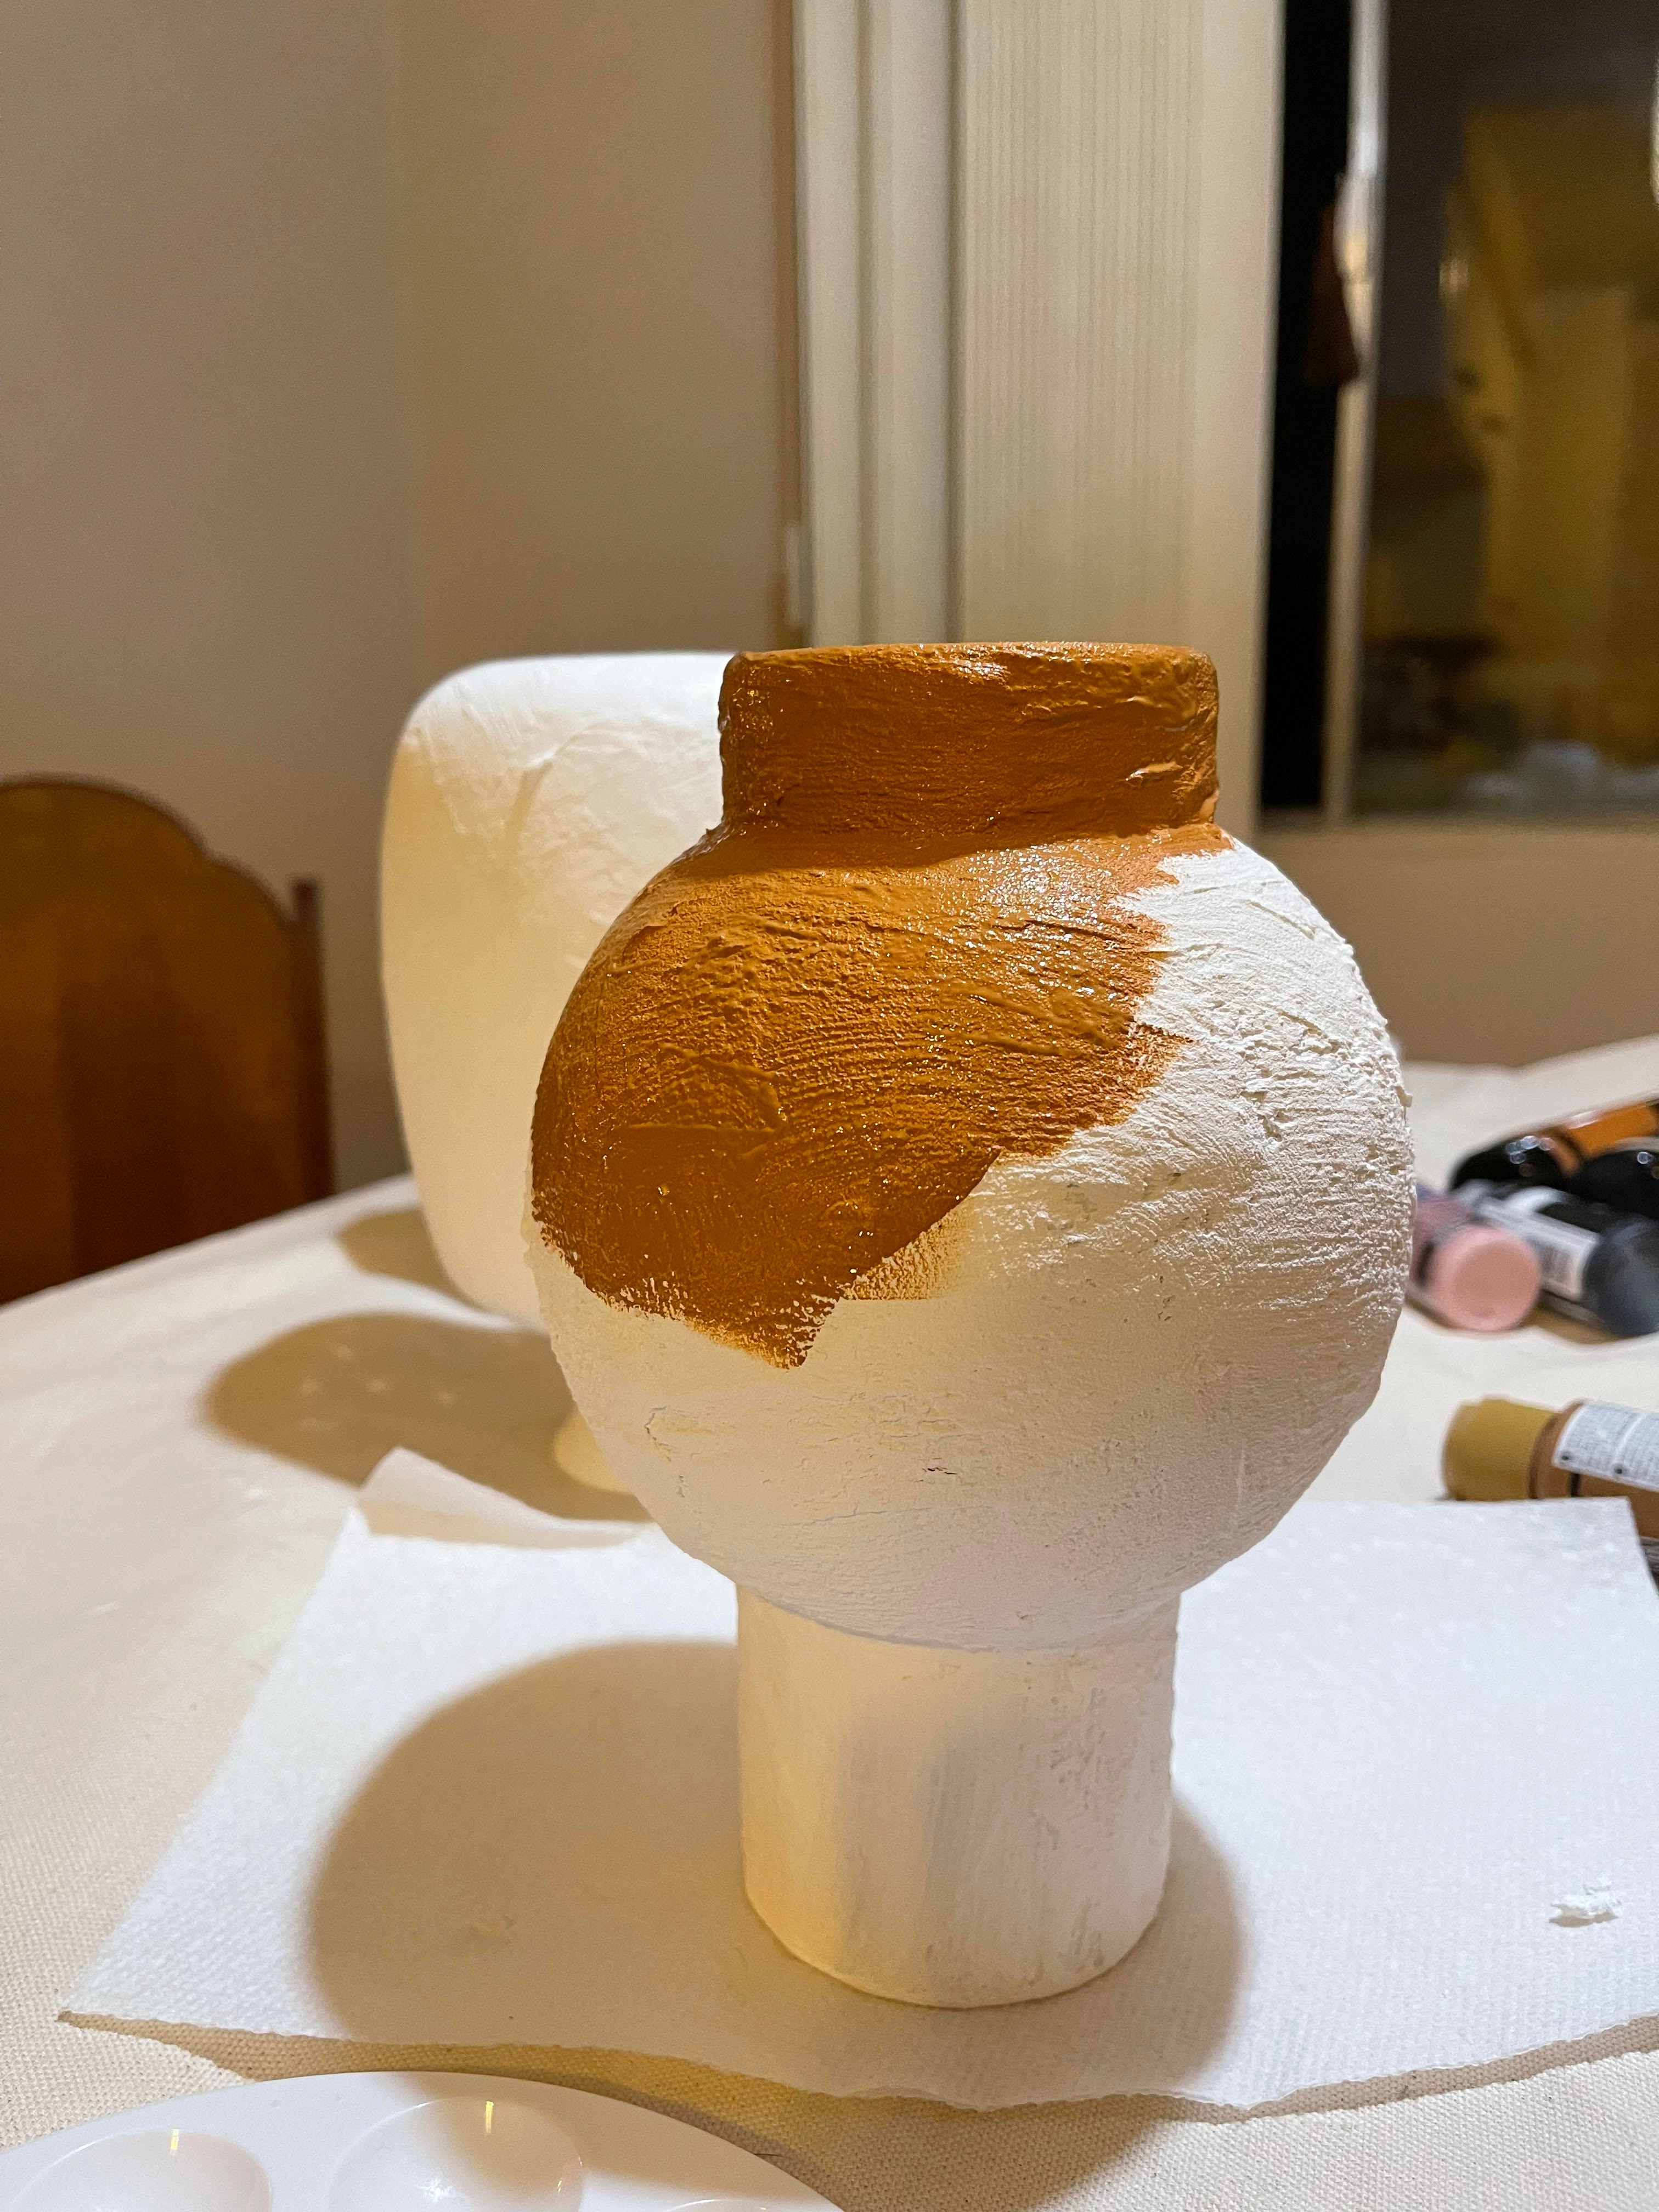
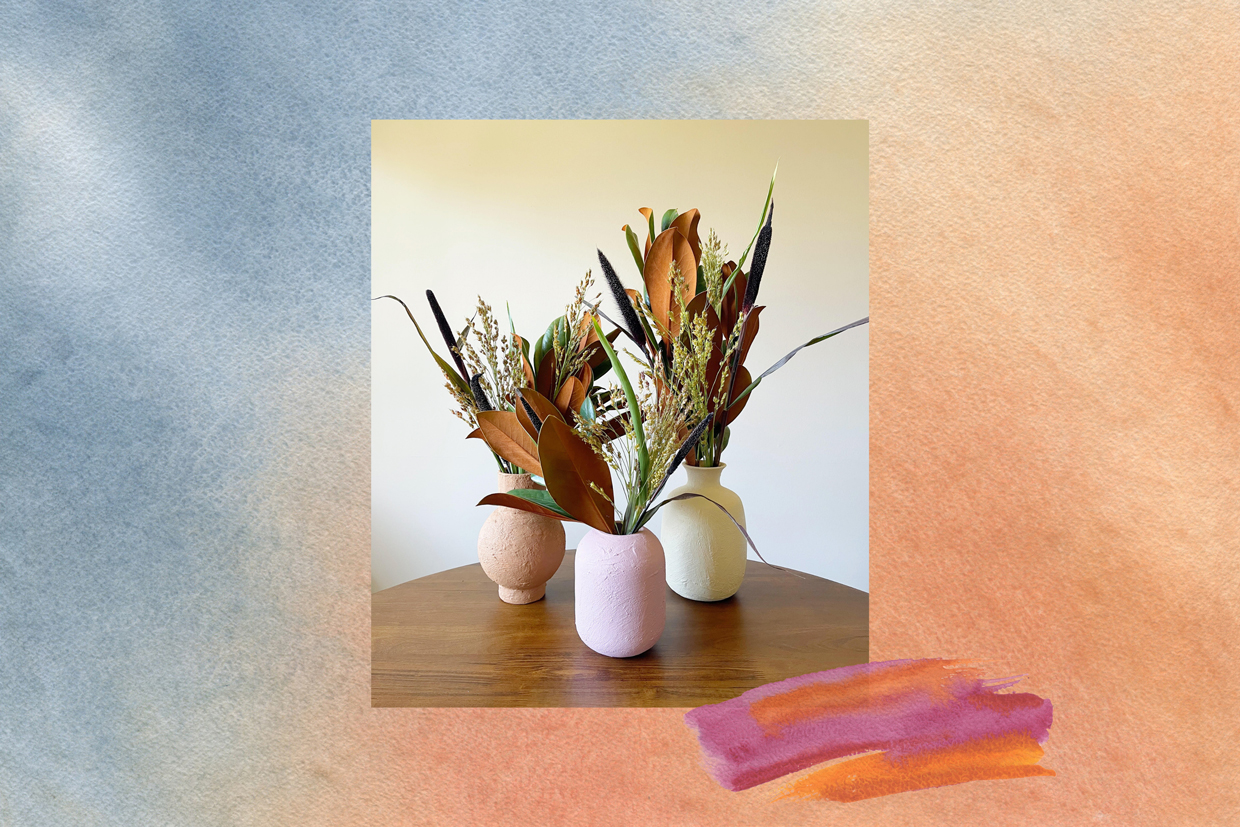
If you don’t wish to keep your vases white, you can add a layer of color to give them an extra autumnal pop. For our example, we wanted something that felt warm and feminine, so we went with sand, terra-cotta, and a dusty rose color scheme. If your vases are different shapes and sizes, a monochromatic approach with one single color would also look great.
In addition to the colors we chose, some of our favorite fall color schemes for this project are:
- Deep plum, olive green, and terra-cotta
- Burnt orange, forest green, and cream
- Charcoal black and dark gray
- Maroon and bronze
- Sand, mustard, and soft tangerine
Once you pick your color, squeeze a dollop of paint onto a palette mixing tray and use a bristled brush to apply the hue over the baking soda layer. For this step, there’s no real method to the madness when it comes to painting technique. However, we chose to paint our strokes in the same direction. And, like the baking soda layer, you’ll need to paint half the vase and let it dry before painting the second half.
After you paint one layer, allow the vase to dry. Once dry, examine your vase and look for any areas you might have missed (pay extra attention to the areas with a lot of texture — those spots tend to have a few spots of white leftover). If you missed a spot, simply dip your brush in the paint and go over it lightly. If your paint is a little thin and you want to add a second layer, repeat this step again for an additional coat of paint.
Step 5: Style With Fall Flowers and Foliage
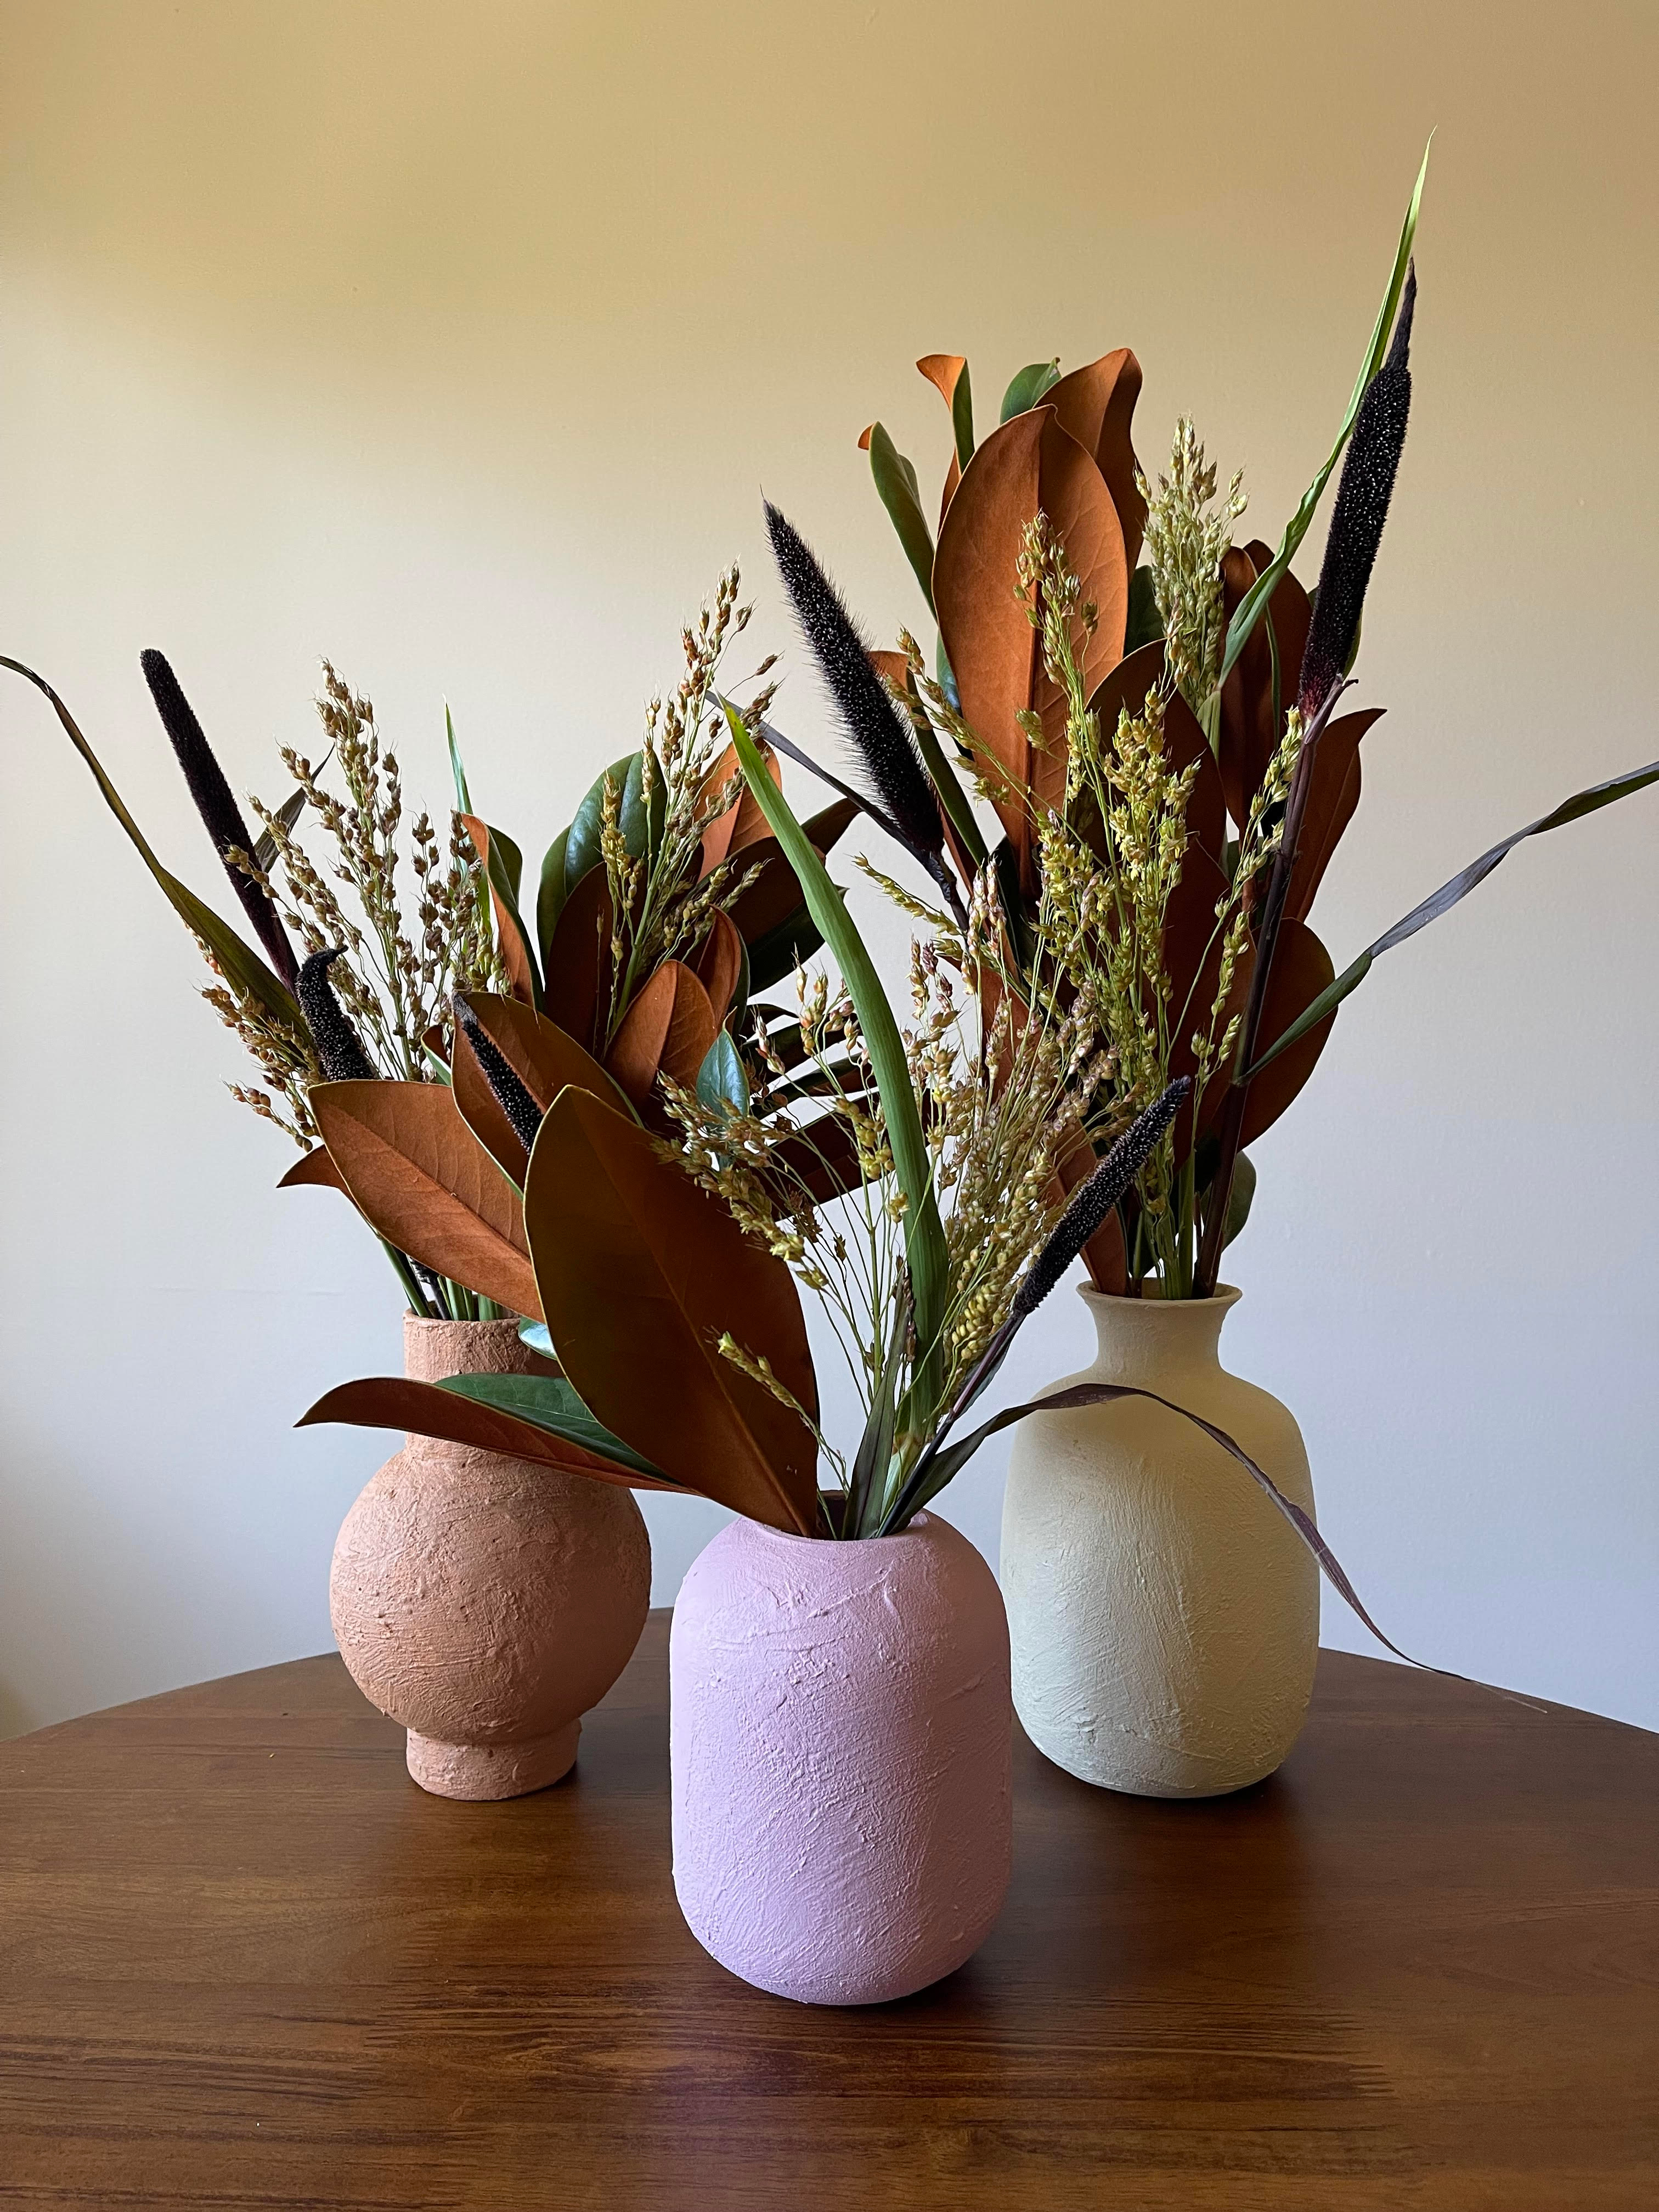
Once your vases are dried and ready for display, top things off with some gorgeous fall flowers. For our example, we went with dried flowers and bunches of Magnolia leaves. It’s hard to make a wrong decision when it comes to flowers. For a bright, cheerful approach, you could go with a mixture of eucalyptus and sunflowers or marigolds. Dried pampas grass would also look great as an autumnal centerpiece (we love this pampas grass bouquet). This DIY is also a great excuse to get outside, enjoy the crisp fall air, and forage for some branches, flowers, and foliage.
If you want your decor to last for years to come, investing in some beautiful fake florals is another great idea. This dried eucalyptus bouquet is one of our favorites. We also love this faux pampas bunch and these feathers and foliage.
This chic DIY is perfect for all levels of DIY and requires no expertise. In fact, the messier it looks, the more textured (and better) it looks! One of our favorite things about this home decor project is that it can be upcycled over and over again. You can repeat step 4 and repaint the colors every season if you want. And, if you love this textured look, you can apply it to plant pots.
We only recommend products we have independently researched, tested, and loved. If you purchase a product found through our links, Sunday Edit may earn an affiliate commission.
