One quick social media scroll is bound to show off some of the season’s most buzz-worthy trends, such as dried floral arrangements, sculptural candles, the never not trending fiddle leaf fig houseplant, and lots and lots of sherpa. This plush textile — and its counterpart, boucle — has graced everything from fashion to home decor with its presence, bringing with it a luxuriously cozy feel.
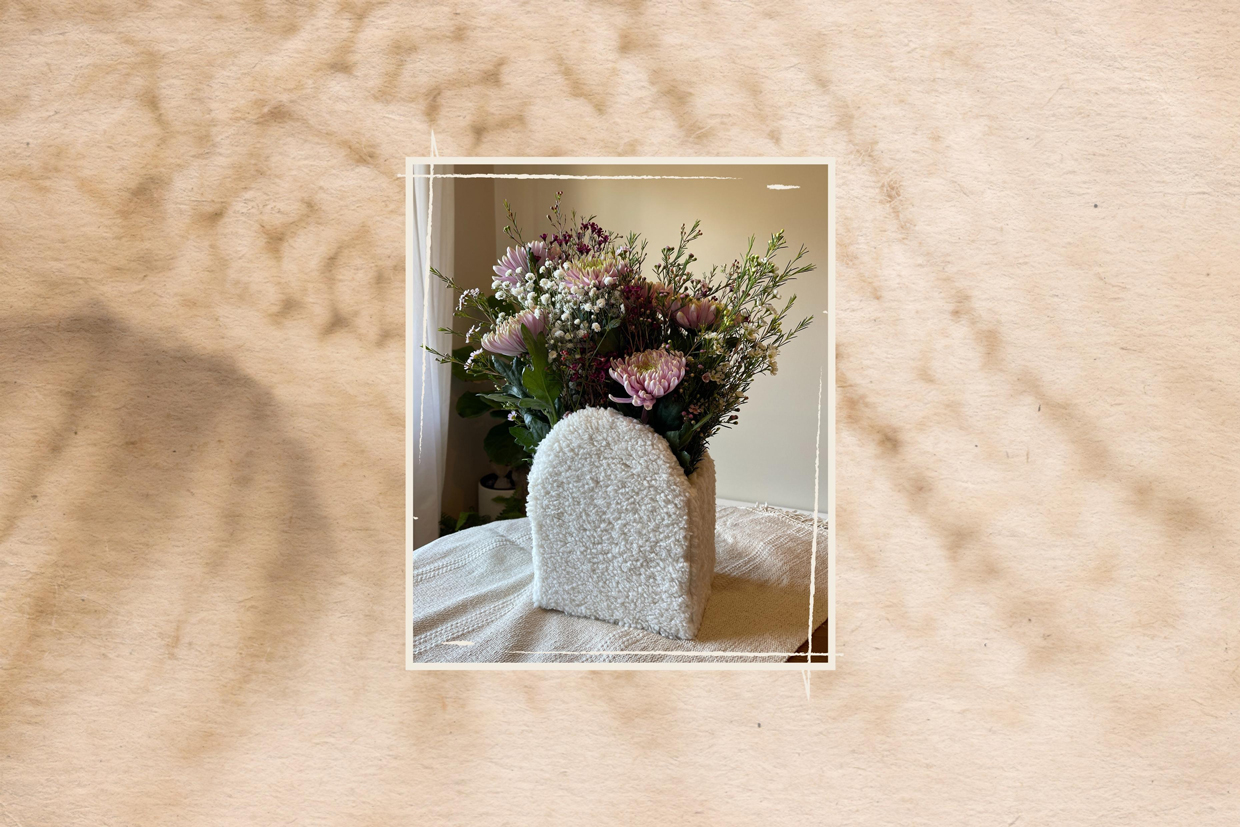
Inspired by Instagram’s favorite textile, our latest home decor DIY adds a nice touch of a sherpa to any space, without the decor (and financial) commitment. Up ahead, we share how to make this ultra-chic sherpa vase cover.

The Sherpa Trend
From fashion to home decor, sherpa was one of 2021’s biggest textile trends and that continues to ring true in 2022. With its plush texture adding cozy vibes to every look, you can find the wintery fabric on everything from a classic zip-up pullover to a cushy accent chair and more.
The sherpa trend has popped up throughout the decades but is mostly credited for its popularity in the 1990s when Levi’s started lining grungy denim jackets in the plush textile. Today, with so many 90s styles back in the zeitgeist, sherpa is making its rounds again, this time as more than the lining of a jacket.
By adding pops of sherpa in your space, you can give it a nice trend-forward refresh without a full-on commitment.
DIY Sherpa Vase: The Materials
The beauty of this DIY project is that it’s made (or can be made) from mostly recycled materials. This is not only an excellent, eco-conscious way to adopt a trend but it’s also incredibly cost-effective, too. For this project, we used a recycled box left over from our holiday shopping, strips of cut-up magazine pages, and leftover paint from another project to create the base. For the sherpa material, we used leftover yardage from chair cushions we recently recovered using new sherpa fabric, but you could also upcycle a sherpa jacket, either from your own closet or thrifted.
Here’s everything you’ll need to create this vase cover:
- 1 medium-sized cardboard box
- ½ roll of masking tape
- 1 old magazine
- 1 cup of flour
- 1¼ cup of water
- Hot glue gun and sticks
- Acrylic Paint
- Mod Podge Hard Coat Waterbased Sealer
- 2 paintbrushes
- Fabric pins or safety pins
- 1 roll of clear tape
- Sharp scissors
- 1 yard of sherpa fabric (or 1 large sherpa jacket)
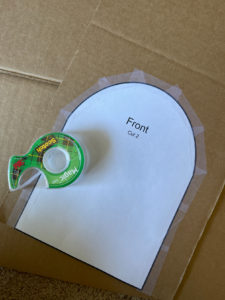
In addition to these materials, you’ll need to print and cut out this cardboard pattern and fabric pattern.
CLICK HERE TO DOWNLOAD THE PATTERN
How to Make Your Own Sherpa Vase
The first step in creating this DIY sherpa vase cover is to break down your box (if you haven’t already) and print and cut out the patterns for the cardboard and fabric. When cutting the patterns, be sure to cut right on the outside of the line. Once you have those ready to go, it’s time to get started.
- Reach for your cardboard pattern pieces and start by placing them onto the cardboard box. Secure each one by lining them with clear tape. Then, with a pair of sharp scissors, begin to cut each piece out. Per the pattern, you’ll need to cut one bottom piece, two side pieces, and two front pieces.
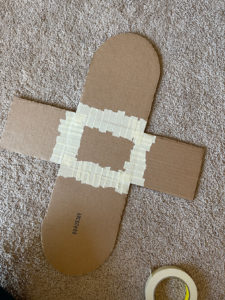
- When you have all five cardboard pieces cut out, place the bottom piece on the floor or table in front of you. Then, reach for the two front pieces and lay them down with the straight ends touching the widest part of the bottom piece. Next, grab the side pieces and lay them down with the shortest side touching the shortest sides of the bottom piece. This should look like a cross, with the arched fronts creating a line down the center and the side pieces sticking out from the middle.
- Begin to tear off pieces of masking tape and secure the sides and front pieces to the bottom piece, as pictured below. Once all four pieces are secure, fold the front and side pieces up — as if to create a box — and use a piece of masking tape to secure each side together. You should now see the shape of the arched vase cover come to life.
From here, continue to secure the pieces in place at the seams with strips of masking tape. To make sure it’s sturdy, line the inside and outside seams in tape.
- Once the seams of the vase cover are outlined in masking tape, it’s time to completely cover it with masking tape (inside and outside). This will help protect the cardboard from becoming soggy and warped when applying the paper mache.
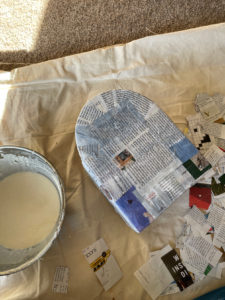
- The next step is to prep for papier-mâché. To start, you’ll want to cut the magazine pages into thin strips — about 1 inch wide and 3 inches long (though it’s okay if they are longer or shorter). Once you have your strips, mix 1 cup of flour and 1 cup of warm water into a large bowl. You want the mixture to have a paste-like consistency, so you might need to add up to ¼ cup extra water. We recommend slowly adding extra water to the bowl and mixing until you reach the desired consistency.
- It’s time to get messy! Start by dipping 1 magazine strip into the mixture and using your fingers to squeeze off excess papier-mâché mixture. Your strip should be fully covered and wet but not have a thick coat of mixture. Carefully place the magazine strip along the edges of one of the front pieces, just like you did with the masking tape. When you reach the arch, apply the strips over the top of the arch. Once your front piece is framed in magazine strips, apply strips to the entire front panel until it’s fully covered. Follow this step for the second front piece, the sides, and the inside of the vase cover, and allow it to dry.
- Once the first layer of papier-mâché is fully dried, repeat step six to create a second layer of papier-mâché. This will ensure your vase cover is extra sturdy.
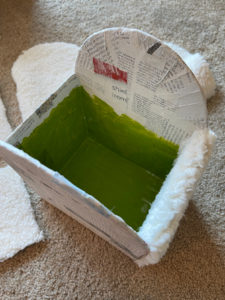
- When the second layer is dried, it’s time to break out the paint. You can choose any color you like for this step. We went with white for the bottom and an olive green hue for the inside. First, apply your bottom color and allow it to dry. Depending on the thickness of your paint, you might need two coats to fully cover the magazine pieces. Then, give the inside a coat of paint, too. For this part, you don’t need to paint the entire inside since you will cover most of it up with fabric. We recommend fully covering the bottom in paint and ¾ of the sides and arched fronts.
- Allow for your paint to fully dry (Tip: You can use a blow dryer to speed up this process) and then apply 1 coat of the Mod Podge Hard Coat Water Based Sealer to the bottom and inside. This sealer will help protect the papier-mâché, giving it some water resistance.
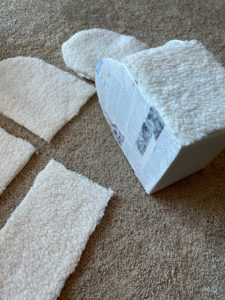
- Next, reach for your fabric pattern pieces and pins. If you don’t have fabric pins, safety pins will also work. Secure the pattern pieces to the fabric with the pins and begin to cut each piece out, leaving about 1 centimeter of excess fabric on the sides.
- Once all of your pieces are cut out (you should have 2 side pieces that are large enough to fold into the inside, 2 front pieces, and 2 inside front pieces), heat up your hot glue gun and apply a line of hot glue to your papier-mâché base, along the bottom edge of one of the front pieces. Then, grab one of the front sherpa pieces and stick the bottom to the edge where the line of hot glue was dispersed. Next, add a line of hot glue to both straight edges of the front piece and stretch the sherpa fabric onto the glue-covered area. By now, most of your front panel should be covered in the sherpa fabric, with the arch left. Apply a line of hot glue along the arch on the front panel and the top edge and stretch the fabric to cover completely. Repeat this step for the other front arch side.
- Next, flip the arch vase cover on its side and add a line of hot glue to the bottom edge. Reach for one of the side fabric panels and secure it to the bottom edge. Then, just like you did with the arched sides, apply a line of hot glue to each side of the hot glue base and stretch the fabric on top. You should be left with a side piece that is mostly attached, with the exception of the top and inside flap. Apply a line of hot glue to the top face of the side panel and top edge and stretch the fabric over, into the center of the vase cover. Once the sherpa fabric is secured to the front and top edge, add a line of hot glue to the remaining side of the sherpa fabric and press it down into the inside of the vase cover. Repeat this step for the other side panel.
- The last step is to cover the inside of the arched sides with sherpa fabric. For this step, start by applying a line of hot glue around the inside of one of the arched sides. Reach for one of the inside sherpa panels and carefully place it over the glued area, pinching it in place to create a secure seam. Then, line the edges of the sherpa panel (the sides and bottom) in hot glue and press it down to meet the papier-mâché base. Repeat this step for the other side.
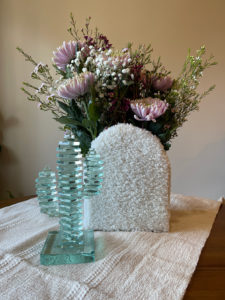
- With your base completely covered in sherpa fabric, you’re almost done! The last step is to dress it up. You can add a large mason jar of water to the inside or two smaller cylinder jars for a fuller floral effect. Then, grab your flowers and greenery and create an arrangement. Another way to use this vase cover is to place a plant inside of it — it would look great with a bushy Boston Fern or a Monstera plant. You’ll want to make sure you remove the plant to water it and add in a tray to catch any excess water to protect the papier-mâché base. The water-resistant sealant will help from any splashes but it doesn’t make the base completely waterproof so it’s best to be safe.
This is such a fun and easy upcycled DIY that, not including drying time, only takes around 2 hours to complete. You can make a few in different sizes and group them together (Tip: Adjust the scale percentage when printing to get a smaller pattern for a mini version!), create multiples and use them as centerpieces at a bridal or baby shower, or even use them as storage for hair accessories, remote controls, or to organize your notebooks on your desk.
We only recommend products we have independently researched, tested, and loved. If you purchase a product found through our links, Sunday Edit may earn an affiliate commission.
